在图片处理的过程中往往需要根据要求变色...一个人各有喜好..一个可能是图片本身的因素等等..反正总归很多原因的..
示范用原图

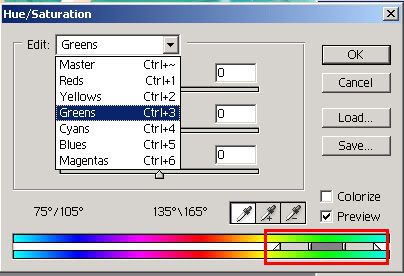
1. 使用 hue/saturation
功能所在为 image >> image adjustment >> hue/saturation
选择后会出现如下画面,

在设定为master下, hue为变色, saturation则是改变饱和度(即色彩的鲜艳程度), lightness则是明暗
不过改变影响全画面..

选择非master系其它图绿色系等颜色, 会在下面出现一个可变动的坐标(红框显示). 在这样的选择下, 只会改变一定范围内色彩影响的范围..
以下是绿色系 改变hue的结果...

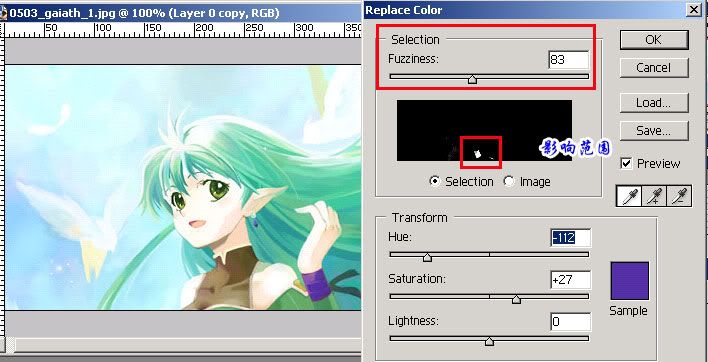
2. replace color
功能所在 image >> image adjusment >> replace color
其实和hue/saturation下分选色系有差不多的效果, 但是如果选择的颜色相对比较单一的话, 建议使用这个
同时在这个模式下也可以显示被改变的范围...方便很多了..